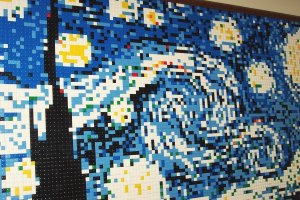
Yes it’s lego!
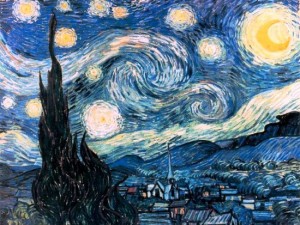
After doing the arcade mural we had the bug to do another Lego project. While flipping around the Internet I found Buxley’s Starry Night project. I thought it was pretty cool, but my wife really fell for it. A little digging around the web I found a good image of Van Gogh’s The Starry Night. After a little enhancement I had the following image to start with:
Then the serious work began. At this point I need to introduce the image editing program that made all this possible. GIMP (http://www.gimp.org/) is a free image editing program. It’s basically the open source counterpart of Adobe Photoshop. The challenge was to reduce the pixels count of the image down to a manageable size since in this case each pixel will be represented by a Lego brick. After a lot of playing around with contrast, sharpness and coloring I ended up with an image of manageable size and good composition.
It’s 138 pixels wide which translates into a Lego mosaic about 43″ wide X 32″ tall. It’s a good, realistic, impressive size when hung on the wall. The better part of the mojo behind this process was converting the color palette of the image to match those available in Lego bricks. Along with that was an effort to minimize the total cost of the project by shying away from those colors that are extremely expensive. A little surfing around BrickLink.com (the Ebay of Legos) will yield up the color values and a good idea about color availability / cost. Basically I created a custom palette in GIMP which represented the most common (aka cheapest) bricks out there. Using that to convert the image, combined with all the contrasts etc. to get it all just right was the harder part of the project.
So now I have my master image, and if I was rich and a glutton for punishment I could make my way through the bitmap by hand and come up with a count by color and order all 14,352 bricks as single bricks. While I think doing it as singles would look better, the fact is that a 2×2 brick in most cases costs the same as a single of the same color. So doing it in all singles would cost a lot more than is necessary. At the same time I despise doing things by hand so in comes the programming.
There is a program or two out there which are used to generate a Lego mosaic from an image, but in my opinion none of them of them do as good a job at color selection as you can accomplish with a little work in GIMP and they either don’t try to minimize your brick count at all or they do a terrible job of it. So I wrote a little VB program to scan through the image and generate a LDraw (Lego CAD program) file with a nearly optimal brick layout. Basically we want as many 2×2 bricks as we can use, then 1×2’s and then finally 1×1’s to finish it off. In this case due to the color details we still ended up with more than 7,000 Lego bricks. The program is pretty cool. One of these days I need to pretty is up and make it available incase anyone else can use it.
With the LDraw master file in hand we were nearing the end of the keyboard work. From LDraw I generated a list of materials and ordered them from various vendors on BrickLink. After all the Legos came in, along with a few baseplates, a piece of fiber board and a life sized print out of the mosaic from LDraw the fun began. After gluing the baseplates to the board and adding a “frame” of brown beveled bricks around the perimeter the brick work began. After a few nights of putting the puzzle together we ended up with the finished product which now hangs proudly in our gameroom. From across the room most people dont even realize that it’s made of Legos.


